Dnsmasq
Contents
Introduction
Dnsmasq is a combined DNS and DHCP server that can be used for small networks.
In this guide we will set-up Dnsmasq under Arch Linux on the Raspberry Pi. It assumed that you already have Arch Linux up and running. If not, see Arch Linux Installation.
The goal is to create a DHCP/DNS server that allows unrestricted Internet access for some devices and restriced Internet access for others. Unrestricted Internet access will use CloudFlare’s DNS service and restricted DNS access will be controlled by OpenDNS. You can of course use an atlernate DNS provider for unrestricted access, e.g. your ISP’s DNS servers, Google DNS etc.
Note
If a user has the ability to change the DNS servers used by their device then they can easily get around any DNS content restrictions created here.
In this example, our Raspberry Pi has been given the static IP address of 192.168.0.2 and the doman of our LAN is home.mydomain.com. Change these to match your network.
OpenDNS
OpenDNS is free for home users. It allows you to customise which web sites your devices on your home network can access. As described above, we will send devices that require restricted Internet access (e.g. children’s tablets).
Once you have signed up for a free account, log in and add your home network under Settings.
OpenDNS needs to know what your external IP address (i.e. the IP address assigned to the WAN port on your router by your ISP).
Go to whatismyip.com to find your external IP and add it to your account with the label Home.
To automatically tell OpenDNS when your external IP address changes we can use dynamic DNS client to do this for us.
Install ddclient:
pacman -S ddclient
Add to the end of /etc/ddclient/ddclient.conf:
server=updates.opendns.com
protocol=dyndns2
login=your@email.com
password='YOUR_OPENDNS_PASSWORD'
Home
Now start and enable the service:
systemctl start ddclient
systemctl enable ddclient
Check that the service is running ok:
systemctl status ddclient
Back in your OpenDNS account, go to Settings and click the IP address of your home network. This will take you to the Web Content Filtering settings for your network.
In the screen shot below, you can see that we have restricted Internet access to several categories of web sites:
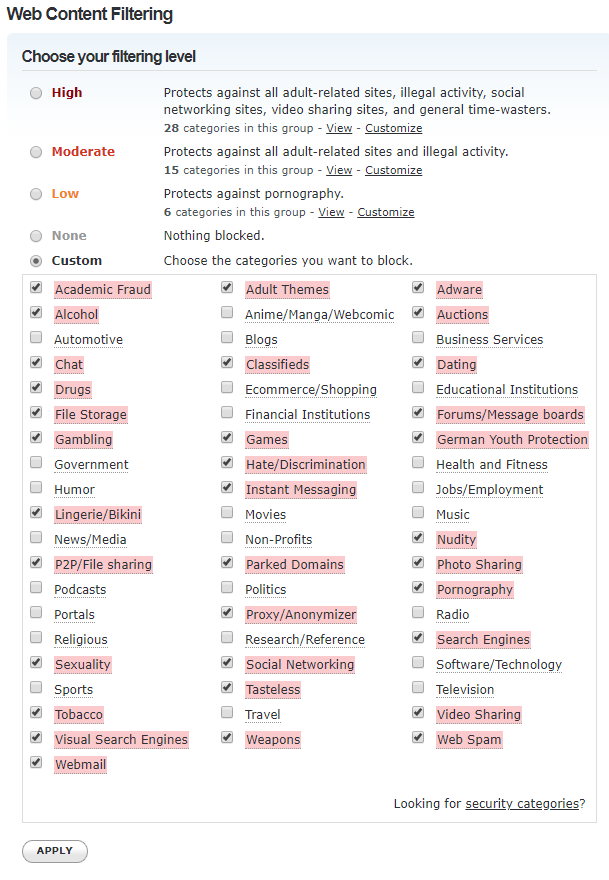
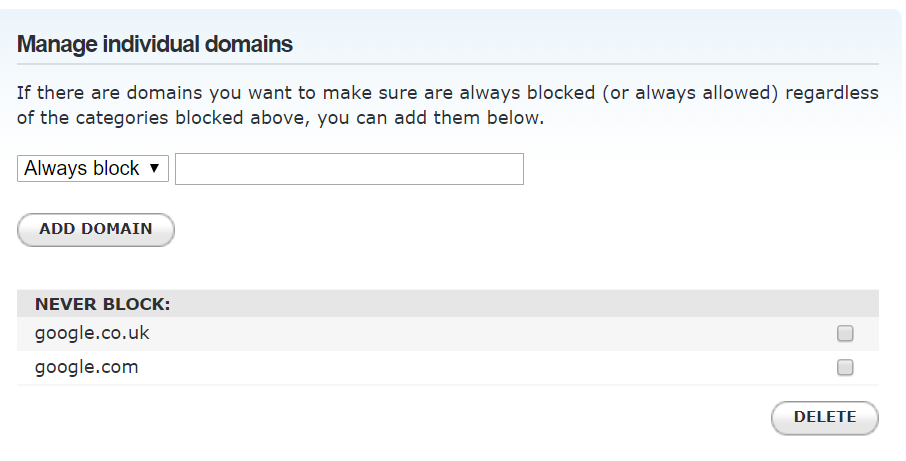
You can add exceptions also. In this case we have allowed access to Google.com and Google.co.uk but we will make sure that these get redirected to Google’s Safe Search via dnsmasq later (see below).
Dnsmasq
Install dnsmasq and bind-tools like so:
pacman -S dnsmasq bind-tools
Next we need to tell dnsmasq to read additional configuration options from /etc/dnsmasq.d. First create the directory:
mkdir -p /etc/dnsmasq.d
Now add to /etc/dnsmasq.conf:
conf-dir=/etc/dnsmasq.d
Add static hosts on your network to /etc/hosts. Dnsmasq will parse any hosts found in this file and add DNS entries for them automatically. In this example we have two entries: one for the router and one for the Raspberry Pi:
192.168.0.1     home.mydomain.com.router router
192.168.0.2     home.mydomain.com.rpi rpi
Create a /etc/resolv.dnsmasq.conf file for dnsmasq to use. This file defines which DNS servers to forward DNS requests onto by default:
nameserver 1.1.1.1
nameserver 1.0.0.1
In this case we are using CloudFlare’s DNS service but you can set them to a provider of your choice if you wish.
To force all Google domains to use Google’s Safe Search we can tell Dnsmasq to create cname entries for all of Google’s domains like so:
curl -s https://www.google.com/supported_domains| while read a; do echo "address=/www$a/216.239.38.120"; done > /etc/dnsmasq.d/google.conf
Create /etc/dnsmasq.d/my.conf to define the hosts etc. on our network. Hosts in the red zone will get a restricted DNS service from OpenDNS. Hosts in the green zone will get unrestricted DNS access from CloudFlare.
# listen on eth0 for DNS and DHCP requests
interface=eth0
bind-interfaces

# use this file for DNS forwarders (CloudFlare)
resolv-file=/etc/resolv.dnsmasq.conf

# domain for home LAN
domain=home.mydomain.com

# get static hosts from /etc/hosts
expand-hosts

# by default, hosts get restricted DNS via OpenDNS
# hosts can be assigned addresses from 192.168.10 to 192.168.0.254
dhcp-range=set:red,192.168.0.10,192.168.0.254,12h

# example reserved DHCP entries
dhcp-host=70:9e:XX:XX:XX:XX,ps4,192.168.0.10,set:green
dhcp-host=b8:27:XX:XX:XX:XX,pc,192.168.0.12,set:green

# example restricted devices
dhcp-host=AC:63:XX:XX:XX:XX,amazonfire-kids1,192.168.0.107,set:red
dhcp-host=cc:9e:XX:XX:XX:XX,amazonfire-kids2,192.168.0.111,set:red

# set clients to use our broadband router as the default gateway
dhcp-option=option:router,192.168.0.1

# set up red tag to use OpenDNS servers for DNS queries
dhcp-option=tag:red,option:dns-server,208.67.222.222,208.67.220.220

# set up green tag to use dnsmasq for DNS for DNS queries
dhcp-option=tag:green,option:dns-server,192.168.0.2
If you have a Real Time Clock for your Raspberry Pi (see Real Time Clock) then you can also enable DNSSEC like so in /etc/dnsmasq.d/my.conf:
conf-file=/usr/share/dnsmasq/trust-anchors.conf
dnssec
Note
Before starting the dnsmasq service, you need to disable the DHCP service on your router.
Start and enable the service:
systemctl start dnsmasq
systemctl enable dnsmasq
Finally, we need to reconfigure eth0 to use dnsmasq for DNS queries. Edit /etc/systemd/network/eth0.network and set in the [Network] section:
DNS=192.168.0.2
If you enabled DNSSEC in your dnsmasq config file above, then you can enale DNSSEC in the [Network] section in /etc/systemd/network/eth0.network:
DNSSEC=allow-downgrade
Here we have set the DNSSEC option to support DNS servers that don’t support DNSSEC.
Then restart the systemd-networkd service:
systemctl restart systemd-networkd
Now you can test if DNS lookups work by using nslookup, e.g.:
nslookup router
You can see if DHCP requests are being serviced by checking the dnsmasq service:
systemctl status dnsmasq
To check that Google searches are using Google’s Safe Search go to https://www.google.com and try searching for something. On the search results page you should see in the top right SafeSearch On.